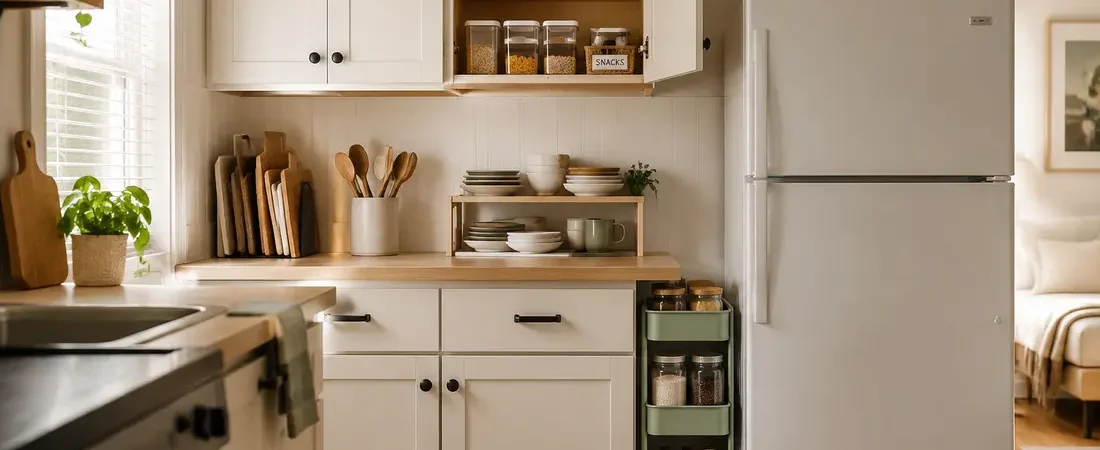
A small kitchen without a pantry can make ordinary groceries feel like clutter. Cereal migrates to the counter, cans disappear behind mixing bowls, and one extra package creates a new storage problem. The fastest way to organize a small kitchen with no pantry is to create predictable food zones, use the full height of the cabinets you already have, and limit each category to the space assigned to it.
This renter-friendly guide covers small kitchen storage without a pantry: what to measure, where to store food, which organizers solve real problems, and how to keep counters and cabinets functional after the first organized week.
Quick answer: where should food go when you have no pantry?
Choose one cabinet, one cart, or one nearby closet shelf as your main food zone. Keep daily staples between waist and eye level, use shelf risers to capture unused vertical space, group small packages in handled bins, and store backstock separately. Before buying containers, measure every shelf and reduce expired food, duplicates, and ingredients you realistically will not use.
If you only do three things today, do these:
- Empty and measure one cabinet. Record its usable width, depth, and height around hinges and shelf supports.
- Group food by routine. Breakfast, cooking staples, snacks, baking, and backstock are easier to maintain than dozens of tiny categories.
- Create a firm capacity limit. When the assigned bin or shelf is full, use what you have before buying more.
Why a no-pantry kitchen becomes frustrating so quickly
The problem is usually not just square footage. Small kitchens combine shallow cabinets, fixed shelves, pipes, appliances, and limited counters in the same few feet. Food packages are also inconsistent: tall bottles waste space beside short cans, soft bags fall over, and small packets vanish at the back.
That creates four common pain points:
- Poor visibility: you buy another item because the first one is hidden.
- Unusable vertical space: a short row of cans occupies a tall cabinet shelf.
- Mixed functions: food, cookware, cleaning supplies, and appliances compete for the same cabinet.
- Too much backstock: warehouse-size packages overwhelm storage designed for weekly groceries.
A good system solves those specific problems. It does not require matching jars, a renovation, or a picture-perfect display.
Before you buy organizers: the 30-minute pantry reset
1. Choose your main food zone
Use the cabinet that is easiest to reach while you prepare meals. A cabinet beside the refrigerator or main counter is usually more practical than one across the room. If no cabinet can hold most dry food, combine one cabinet for daily staples with one slim cart or nearby shelf for overflow.
2. Empty one area at a time
Do not empty the entire kitchen unless you have several uninterrupted hours. Work cabinet by cabinet. Discard food that is spoiled or past the date you are comfortable using, set aside unopened food you will not use for donation where accepted, and wipe the shelf before returning anything.
3. Measure the usable space
Measure the inside width, depth, and height. Then note anything that reduces those dimensions: hinges, a door frame, shelf pins, plumbing, or a lip at the front. For pull-out bins and carts, measure the route as well as the final parking spot.
Leave a little tolerance. An organizer that is exactly as wide as the opening can scrape the cabinet or become impossible to remove when full.
4. Sort by how you use food
Keep the number of categories small. A practical starting list is:
- breakfast and coffee;
- cooking staples;
- cans and jars;
- snacks;
- baking;
- backstock.
If two people use the kitchen differently, a personal snack basket or breakfast bin can prevent daily searching without reorganizing the entire room.
Build a four-zone system for a small kitchen with no pantry
Predictable zones reduce search friction because each item has one logical first place to look. Keep the categories broad enough to survive changes in brands and routines:
- Zone 1: daily staples. Coffee, cereal, bread, oils, and other items used most days belong in the easiest-to-reach cabinet or drawer.
- Zone 2: meal-building ingredients. Group grains, pasta, canned goods, sauces, and spices near the main prep area.
- Zone 3: breakfast and snacks. Use one shallow bin or shelf so loose packages stay visible and contained.
- Zone 4: backstock. Keep unopened replacements in one upper shelf, nearby closet bin, or slim cart with a firm capacity limit.
This four-zone system is flexible enough for a rental and specific enough to prevent groceries from drifting across the kitchen.
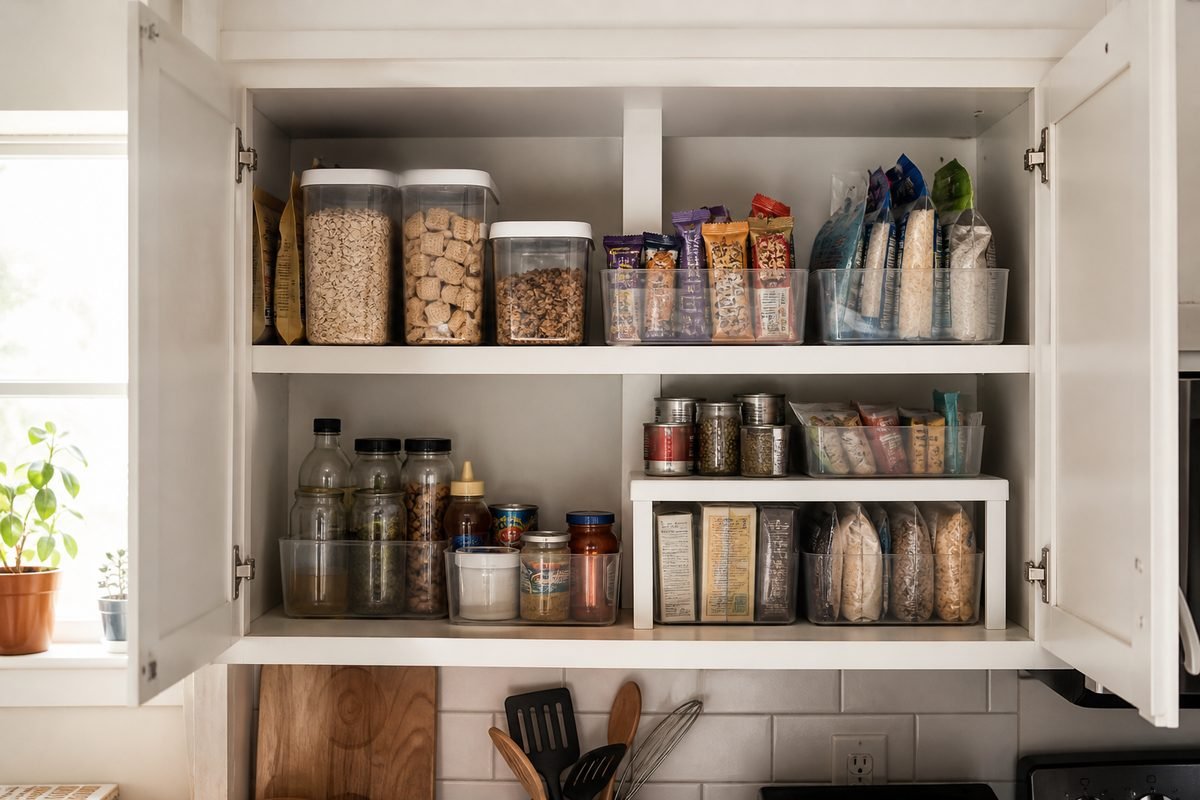
17 renter-friendly ways to organize a small kitchen with no pantry
1. Turn one cabinet into a dedicated food cabinet
A single clear food zone is easier to remember than groceries scattered among every cabinet. Move rarely used serving pieces, seasonal bakeware, or duplicate mugs elsewhere first. Keep daily food on the most accessible shelf and lighter backstock higher up.
2. Add a shelf riser where height is being wasted
Shelf risers work best for short, stable items such as cans, bowls, mugs, and jars. They create a second level without modifying the cabinet. Measure the tallest item that must fit below the riser and the usable shelf depth before ordering.
Avoid stacking heavy or breakable items so high that you must lift them over objects at the front. The goal is easier access, not maximum density.
3. Use handled bins for loose packages
Deep cabinets are difficult because the back becomes invisible. A handled bin turns the whole shelf into a simple pull-out zone. Use one for snacks, one for baking supplies, or one for breakfast packets. Choose open bins for visibility and wipeable materials for packages that may leak.
Label the category, not every product. Broad labels survive changes in brands and routines.
4. Decant selectively, not automatically
Clear containers can make frequently used staples easier to pour and can protect open packages. They are most useful for items you buy repeatedly in similar quantities, such as rice, oats, flour, or cereal.
Do not decant food just for appearance. Keep cooking instructions, allergen information, lot codes, and best-by dates until the food is used. If a package already stacks well and closes securely, it may not need another container.
5. Use the back of a suitable door
An over-the-door organizer can hold light packets, wraps, snacks, or spices when the door is strong enough and has adequate clearance. Check the door thickness, the gap above it, the basket depth, and whether the loaded organizer will hit a wall, handle, or shelf.
Keep glass jars and heavy cans elsewhere. Added weight can strain hinges, and a deep rack may prevent the door from closing.
6. Fit a narrow rolling cart into a dead gap
A slim cart can turn the gap beside a refrigerator or cabinet into accessible storage. It is useful for bottles, canned goods, onions, or backstock, depending on the shelf design.
Measure width at the floor, middle, and top because walls and appliances are not always perfectly square. Leave ventilation clearance around the refrigerator according to its manufacturer, and do not place oils or heat-sensitive food beside an oven.
7. Store pans, trays, and cutting boards vertically
Vertical dividers make flat kitchen items easier to remove without lifting an entire stack. This can free a shelf that is better suited to dry food. Place the heaviest pans in a lower cabinet and confirm that the divider is stable when only one item remains.
8. Create a small daily-use counter station
Counters should support cooking, but one contained station can be practical. A tray for coffee or tea keeps several small items together and makes the counter easy to wipe. Limit the station to items used almost every day. Appliances used less than weekly should not automatically earn permanent counter space.
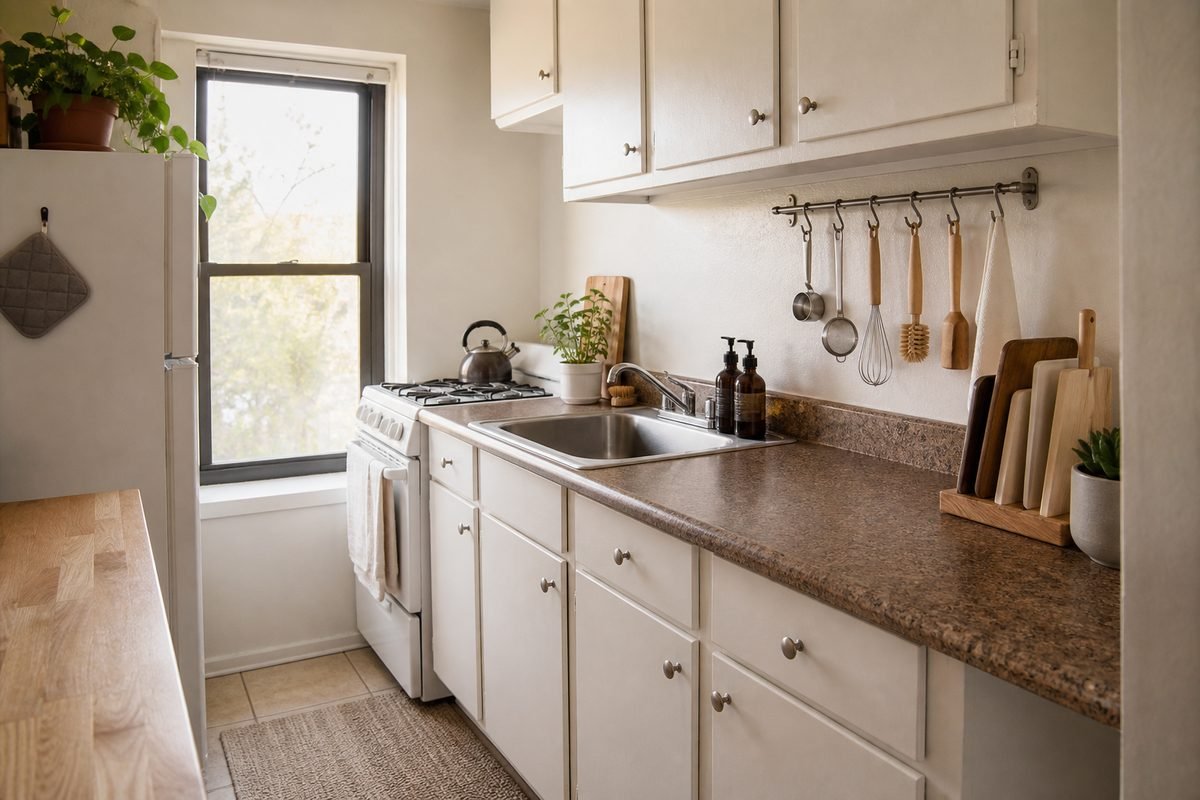
If you are deciding what should stay visible, compare open shelving and closed storage in a small space.
9. Use the top of the refrigerator carefully
The refrigerator top can hold a lightweight basket of rarely used paper goods or sealed backstock if the appliance manual permits it and ventilation remains clear. Avoid heavy objects, liquids, heat-sensitive food, and anything that could fall when the refrigerator door closes.
10. Give drawers one purpose each
A shallow drawer can store tea, spices, wraps, or food-storage bags when divided into simple zones. Place frequently used items at the front and duplicates behind them. Before moving spices into a drawer, make sure labels can be read from above.
11. Use turntables only for the right categories
A turntable can make oils, condiments, or small jars accessible in a corner cabinet. It is less effective for soft bags, tall unstable bottles, or a shelf that is too shallow for the base to rotate freely. Measure the full diameter and allow room for labels and handles.
12. Create a controlled backstock zone
Backstock is the unopened extra item waiting behind the one currently in use. Keep it in one labeled bin, basket, or upper shelf. This prevents duplicates from spreading through the kitchen and shows you when bulk buying no longer fits your home.
A useful rule for small homes is one open item plus one replacement for staples you use consistently. Adjust the rule for household size and shopping frequency.
13. Borrow one nearby shelf
If the kitchen cannot hold everything safely, use a shelf in a nearby coat closet, dining nook, or utility cabinet for sealed, shelf-stable food. Keep food separate from household chemicals, pet supplies, and damp areas. A single closed bin protects packages and keeps the arrangement visually calm.
14. Put light items above cabinets only when safe
The space above upper cabinets may hold a lightweight basket of infrequently used supplies. It should be easy to retrieve with a stable step stool and should not sit near grease, exposed wiring, or a heat source. This is overflow space, not the best home for daily food.
15. Match storage to package shape
Round turntables suit jars, vertical dividers suit flat items, narrow bins suit packets, and shelf risers suit short cans. Buying the organizer before identifying the package shape is one of the most common reasons a system fails.
16. Let the available space set your shopping limit
Small kitchens rarely benefit from buying every item in bulk. Compare the saving with the storage cost: Will the package fit? Will you use it before quality declines? Will it displace something used more often? A smaller package that fits your routine can be the better value.
17. Schedule a ten-minute weekly reset
Once a week, return stray food to its zone, move older items forward, wipe one shelf, and add nearly finished staples to the shopping list. A short reset prevents the system from requiring another large reorganization. For a whole-home version, use our weekly reset routine for a clutter-free small home.
Three realistic layouts for a kitchen without a pantry
For a narrow galley kitchen
- Use one upper cabinet for daily dry food.
- Add one riser for cans and jars.
- Store pans vertically in a lower cabinet to free another shelf.
- Use a slim cart only if it does not narrow the walkway or block appliance ventilation.
For a one-wall kitchen or studio
- Keep the visible counter mostly clear to reduce visual clutter.
- Use matching opaque or lightly tinted bins inside open shelving.
- Move backstock to one nearby closed basket.
- Choose organizers that can move with you rather than permanent fixtures.
If your whole room feels visually crowded, these renter-friendly ways to make a small room look bigger can help you simplify the surrounding space.
For a shared kitchen
- Reserve one common shelf for shared staples.
- Give each person one clearly labeled bin.
- Agree on one overflow area and one shopping list.
- Keep allergy-sensitive foods separated and clearly identified where needed.
How to solve the hardest pantry categories
Chips, bread, and soft bags
Place soft packages upright in a wide open bin rather than stacking them. Use clips to close opened bags and avoid crushing bread beneath heavier food. One bin creates a natural limit and prevents half-empty packages from spreading.
Cans and jars
Arrange cans in short rows by type and keep labels visible. A riser is safer and more flexible than building a tall, unstable tower. Put heavier glass jars on a lower or middle shelf rather than above eye level.
Spices
Store spices where you can read the labels: in a shallow drawer, on a low turntable, or on a short stepped riser. Keep them away from direct heat and steam. Combine duplicate containers only when the products and dates are compatible.
Baking supplies
Keep small bags, decorations, and extracts in one handled bin. If you bake infrequently, the bin can live on a higher shelf and come down as a complete kit. Heavy flour and sugar containers are safer at waist height or below.
Small appliances
Rank appliances by actual frequency of use. Daily items may stay on the counter; weekly items should be easy to reach in a cabinet; seasonal or rarely used items can move outside the kitchen. If an appliance has not been used for a year and does not serve a specific planned need, consider whether it deserves scarce space.
Optional organizers worth considering
You do not need all of these. Choose only the tool that solves a measured problem. Our recommendations are based on published dimensions, materials, adjustability, access, and suitability for compact homes. We have not physically tested every product mentioned, so confirm the current specifications and fit before ordering.
Best for doubling cabinet height: Deco Brothers expandable cabinet shelf
This two-level metal organizer can be stacked or placed side by side. The manufacturer lists an adjustable arrangement, which makes it useful when cabinet width is awkward. It is most appropriate for plates, mugs, jars, and short cans—not for unstable towers of heavy cookware.
Measure first: cabinet depth, the tallest item below the riser, and the clearance above it.
View the Deco Brothers cabinet shelf on Amazon
Best for freeing a shelf used by bakeware: YouCopia StoreMore rack
The adjustable dividers hold trays, cutting boards, and baking pans upright in a lower cabinet. This is a useful indirect pantry solution: compacting bakeware can release an entire shelf for food. It works best when the cabinet is tall enough for your largest tray and the rack remains stable when an item is removed.
Measure first: cabinet height and depth, plus the thickness and handle shape of your largest pan.
View the YouCopia bakeware rack on Amazon
Best for a very narrow gap: XYZLVSI slim rolling cart
This cart is designed for a gap a little over five inches wide and provides several levels of narrow storage. It can help with bottles and small backstock when a conventional cart will not fit. A narrow cart is only useful if it rolls out fully, does not interfere with the refrigerator or range, and remains stable on your flooring.
Measure first: the gap at three heights, usable depth, baseboard projection, floor transition, and appliance ventilation clearance.
View the XYZLVSI slim rolling cart on Amazon
As an Amazon Associate I earn from qualifying purchases. Product availability, specifications, and seller details may change. Check the current listing before buying.
What is usually not worth buying for a tiny kitchen
- A large matching container set before measuring. Some sizes will not fit your shelves or your actual groceries.
- Very deep bins without handles. They can turn one visibility problem into another.
- Permanent adhesive storage near heat or steam. Adhesive can fail or damage a rental surface. Follow the product and surface instructions and check your lease.
- Bulky furniture that narrows the walkway. Storage should not interfere with doors, appliance access, or safe movement.
- Organizers for categories you do not own. Design around your groceries, not a generic pantry photo.
- Too many tiny labels. A flexible category such as “breakfast” is easier to maintain than a separate container for every item.
For more ideas that work across rooms, see our guide to small-apartment storage ideas that actually work.
For more room-by-room ideas, browse our Storage Solutions.
Food-storage and safety notes
- Keep food away from household cleaners and other chemicals; the FDA’s food-storage guidance also recommends checking damaged packages and cans.
- Do not block appliance vents, electrical panels, sprinklers, or required access points.
- Store heavy containers where they can be lifted without reaching above your head.
- Keep dry food sealed and inspect packages for moisture or pests before placing them in a shared bin.
- Follow manufacturer instructions for appliance clearances, weight limits, and adhesive products.
- Retain allergen, preparation, lot, and date information when transferring food to another container. The USDA FSIS guide to food product dating explains what common date labels mean.
Frequently asked questions
Can I use a bookcase as a pantry in a rental?
Yes, if it is stable, does not block a walkway, and is suitable for the weight. Keep heavy items low. Follow the manufacturer’s anti-tip instructions, review the CPSC Anchor It! guidance, and comply with your lease requirements. Closed bins can make open shelving feel calmer and protect food packages from dust.
Where should I store food if every cabinet is full?
First remove duplicates and move rarely used cookware or serving pieces. Then use one cart or one nearby closet shelf for sealed, shelf-stable food. Avoid scattering groceries through several rooms because visibility and inventory become harder to manage.
Should I buy clear or opaque pantry bins?
Clear bins improve visibility inside closed cabinets. Opaque bins reduce visual clutter on open shelves. In either case, choose a size you can lift comfortably and a material that is easy to clean.
Are airtight containers necessary?
Not for every product. They are most useful for opened dry staples that you use often. Secure original packaging may be sufficient for many foods. Always preserve preparation, allergen, date, and product-identification information.
How do I organize a deep cabinet?
Use pull-out handled bins or short rows with the same category front to back. Keep the most-used item at the front and backstock behind it. Avoid placing unrelated loose items in several layers.
How do I organize a cabinet with fixed shelves?
Measure each opening separately and use risers, short bins, or a turntable that fits the existing height. Vertical storage elsewhere can also free a fixed shelf for food.
Can food be stored under the sink?
It is generally a poor choice because of plumbing leaks, moisture, and proximity to cleaning products. Reserve that cabinet for appropriate household supplies, and keep food in a dry area separated from chemicals.
How can I make a makeshift pantry look less cluttered?
Use fewer, broader categories; repeat one or two container styles; keep package fronts from facing every direction; and leave a little empty space. A curtain or cabinet door can hide storage, but accessibility and ventilation still matter.
How much backstock should a small kitchen hold?
Base it on household size and shopping frequency, but give backstock a fixed physical limit. For many staples, one open package and one replacement are easier to manage than several duplicates.
What should go on the highest shelf?
Lightweight, infrequently used items that are safe to retrieve belong higher. Avoid heavy jars, large appliances, and anything needed every day.
How do I keep the kitchen organized after grocery shopping?
Put new duplicates behind older items, remove unnecessary outer packaging when product information is preserved, and stop when a category reaches its assigned capacity. Add overflow to the meal plan before the next shopping trip.
Can I organize a small kitchen without buying anything?
Yes. Consolidate categories, move rarely used objects, reuse sturdy open boxes as temporary bins, store flat items vertically, and establish a weekly reset. Buy an organizer only after the remaining problem has a precise measurement and purpose.
Your no-pantry kitchen checklist
- Choose one main food cabinet or shelf.
- Remove expired food, unwanted items, and unnecessary duplicates.
- Measure usable width, depth, height, hinges, and clearances.
- Create five or six broad food categories.
- Place daily staples between waist and eye level.
- Use a riser only where vertical space is wasted.
- Use handled bins only where packages disappear at the back.
- Keep one controlled backstock zone.
- Protect counters for food preparation.
- Reset the system for ten minutes each week.
Sources and further reading
- FDA: Are You Storing Food Safely?
- USDA FSIS: Food Product Dating
- U.S. Consumer Product Safety Commission: Anchor It!
The bottom line
A small kitchen does not need a traditional pantry to work well. It needs one obvious food zone, categories that match your routines, and storage tools chosen for measured gaps. Start by editing what you own and reclaiming one cabinet. Add a riser, bin, rack, or cart only when it solves a problem you can name.
The best setup is not the one that holds the most. It is the one that lets you see what you have, prepare a meal without moving clutter, and reset the kitchen in a few minutes.